If a picture is worth a thousand words, a stunning product picture is worth a thousand website visits.
I don't have data to back up that statement (yet). Nevertheless, product photography can become this valuable to your ecommerce website strategy.
According to Trellis, 51% of Americans with internet access prefer to shop online, and that segment of buyers is poised to keep growing. But that also means 49% of Americans might still be more comfortable buying certain things in the store -- where they can see, touch, and demo the product before handing over their money.
The convenience of ecommerce isn't everything to every customer; being able to browse merchandise from the living room couch is just one part of what makes an internet storefront successful. To reach the 51% of people who do prefer buying online, you also need to give your audience clear, eye-catching photos of your products, or these visitors aren't likely to have confidence in your offerings -- confidence they can get by walking into a store and seeing the item in person.
But product photography isn't as simple as pointing and shooting. Even the most basic products need the correct equipment, lighting, and space to produce beautiful images that sell shoppers right from the purchase page.
Don't worry, your shopping list isn't as big as you think. Some items you already own!
Here's an easy list of tips and tools to get you started, along with real examples of product photos that demonstrate this advice.
6 Product Photography Tips (and Examples) for Taking Pictures That Sell
1. Don't Be Afraid to Use Your Smartphone Camera
This is the part where I'm supposed to convince you to invest in a high-end, 50-megapixel (MP) camera with a 100-millimeter screw-on lens. But I'm not going to do that. If you already own a camera that fits this description, take advantage of it. But for many types of products, it's completely acceptable to shoot product photos on a smartphone.
Some of the earliest smartphones had cameras that operated on fewer than 4 megapixels, which made it difficult to capture important visual elements of products where detail matters.
But newer smartphones such as the iPhone 7, Google Pixel, and Samsung Galaxy S4 boast 12MP and 13MP lenses along with numerous "temperature" settings to optimize your shots for the different types of light you might shoot in (we'll talk more about light in just a minute).
Here's a product photo you won't believe was shot with just an iPhone 4s and clever desk lamp placement:
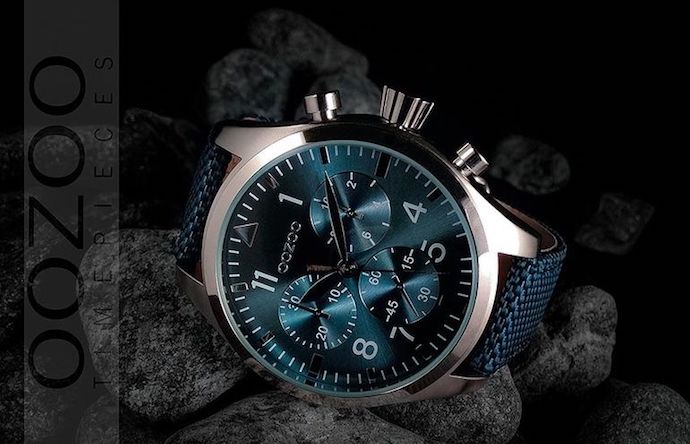 Image by Andrew Griswold
2. Shoot From a Tripod for Photo Consistency
Before explaining tripods, I'm obligated to start with a cardinal rule: Don't prop your phone against something sturdy to aim your lens toward the subject. It's just too easy for this makeshift setup to slide around during the shoot and cause inconsistencies in your photos' appearance. If you rest your camera on, say, a stack of books, just be sure this arrangement doesn't change over the course of the shoot.
There's no harm in holding your camera yourself when shooting just a few product photos for your ecommerce website. But as your business grows, and you take more photos of more products, it can be difficult to standardize the product's orientation in each photo when shooting handheld.
To ensure consistency across your products, you'll need a tripod. And luckily, buying one isn't always the big, industrial-sized investment it used to be. Here are two types of tripods to consider and one accessory you'd need when shooting on a smartphone:
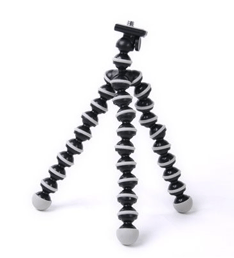
Traditional vs. Flexible
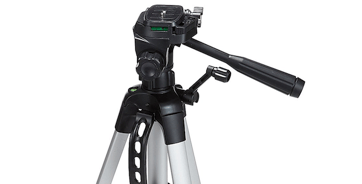
 Images via AmazonBasics | Sunpak
The one on the left is a traditional, extendable tripod stand, and the one on the right is a shorter but flexible mount with legs you can bend to achieve the camera angle you want.
(You can't tell from the two photos, but the mount on the right is roughly a foot high -- considerably shorter than a traditional tripod, which can extend to more than five feet high.)
Mobile Grip
You'll notice a screw on the top of both products. This screws into your camera and holds it in place when you're shooting from the tripod. The underside of most professional-grade cameras has a screw hole just for this purpose, but smartphones can use the following adapter:
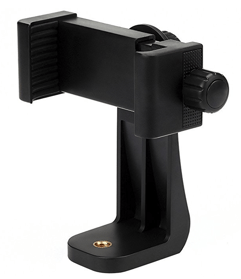 Image via Vastar
The adapter grips the sides of your smartphone, and can screw into either type of tripod, allowing you to operate the camera controls with the phone screen facing outward and toward you. Once you determine which mount you'll need, set it up in front of your product, and consider putting three pieces of tape on the ground to mark where you'd like to keep each leg of your tripod over the course of the shoot.
3. Natural Light vs. Artificial Light: Choose One
Never underestimate how certain types of light can improve (or hinder) your product photography. Remember, buyers get the best look at an item in person, where they can see everything they need to before purchasing. The right lighting arrangement helps you reveal those critical decision-making product features when all website visitors have to go on is a photo.
A single lighting setup might not work for every single product -- a lighting arrangement that works for some products might weaken the appearance of others. There are two types of light you can choose as your main light source:
Natural Light
Natural light refers to sunlight -- simple as that. It's also known as "soft light" because the sun casts a larger, softer range of light than, say, a lamp shining directly on the product. Ecommerce product shots thrive in natural light if:
- The product is shot outside or meant to be used outside.
- The product is used by, worn on, or shot with a person (people tend to look better in natural light).
- You're trying to emphasize the product's surroundings, rather than specific attributes of the product.
Below is an appealing product photo taken under natural light. The sun coming in from the left lights the briefcase perfectly, while casting a gentle shadow on the legs of the man carrying it to emphasize the product.
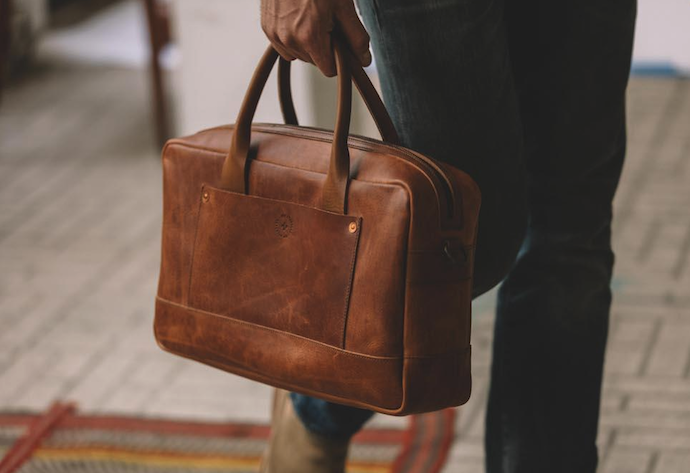 Image via WP Standard
Artificial Light
Artificial light includes candles, fire, and more commonly, light bulbs. It's also referred to as "hard light" because it produces a smaller but more focused light surface. This type of light caters to products with physical details that need to be highlighted to impress an online shopper.
Here's an appealing product photo taken under artificial light, where the watch's texture and clock face design are its main selling points.
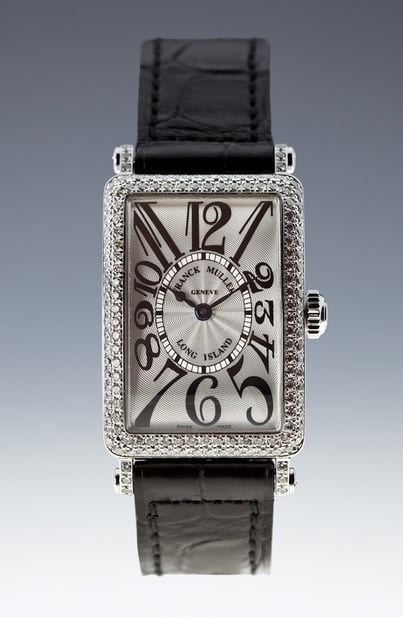 Image via Modahaus
As a general rule, you should stick to just one type of light per photo -- natural or artificial. Adding natural light to an artificially lit photo can soften a product that's meant to look sharp, and adding artificial light to a naturally lit photo can sharpen a product that's meant to look soft. You don't want to get in your own way.
4. Fill or Bounce Your Light to Soften Shadows
Whether you use natural light or artificial light, you'll need to lessen the shadows any potential hard light casts on the opposite end of a product. There are three ways to do this:
Fill Light
Include another, less-intense light source to supplement your main light. This additional light is called your fill light, and is used as a counterbalance to soften the natural shadow your main light produces behind an object. To do this, place your fill light opposite your main light so your product sits between both light sources.
Flashbulb Bounce Card
A bounce card, or reflector card, is a small card that "reflects" or "bounces" the main light back onto the surface beneath your product to reduce shadows.
Some bounce cards attach to the flashbulb of a professional camera lens to diffuse the light from the camera's flash. This card splashes a softer light onto the subject from above your set -- rather than straight at it -- so you don't have long shadows trail behind the object you're shooting. See two versions of this item below -- both white (left) and foil (right) screens can diffuse the flash.
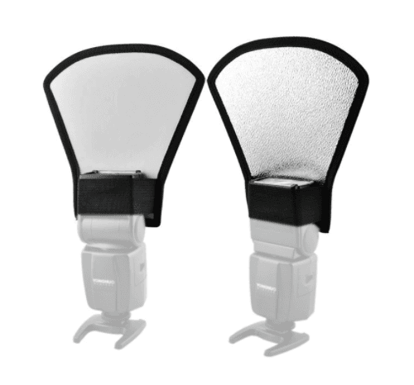 Image via Andoer
Standalone Bounce Card
If you're shooting from a smartphone, a flashbulb bounce card isn't an option, since you don't have a physical flash you can attach it to. Instead, make your own standalone bounce card positioned opposite your main light source. For beginners to product photography, this bounce card can effectively replace your fill light, which counters the hard light from the camera flash or lamp that's facing toward the front of your product.
See a standalone bounce card below, set up behind the miniature horse:
 Image via Photojojo
No matter which type of light counter you use, your goal is to reduce shadow while still highlighting the qualities of your product that make it valuable to website visitors. If shot just right, you'll see a huge difference:
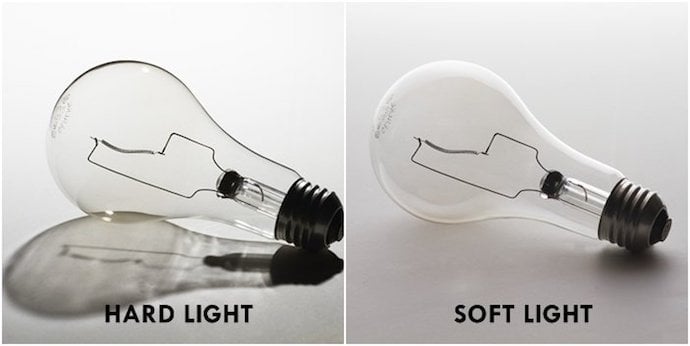 Image via GetMeAShop
5. Use a Sweep or Portrait Mode to Emphasize the Product
There isn't one right way to position your product, lights, and bounce cards – they can change dramatically depending on your background. But don't choose a background based on what's easiest to create. Backgrounds should resemble how you want your buyers to perceive your product when viewing it online.
Consider first whether you'd like a white background or a more dynamic, real-world background. There's an easy way to achieve each one.
White Background: Sweep
For white backgrounds, it's not as simple as setting up a table against white drywall. Even smartphone cameras can pick up little blemishes on a white wall that you wouldn't notice with the naked eye. To capture a perfect white background with no corners or blemishes, use a sweep.
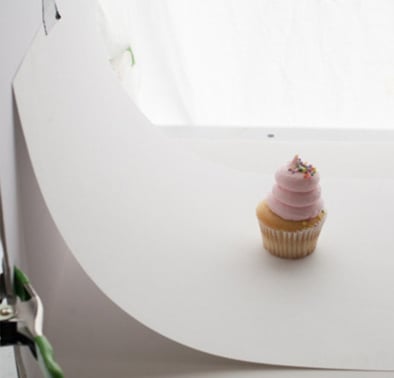
A sweep is a large bendable sheet of paper, whose bottom acts as the surface beneath your product and then curves up into a white wall behind the product. On camera, the sweep's curve is invisible, emphasizing key product details and allowing the item to own all of a website visitor's attention. Here's a side-by-side comparison showing why a sweep matters:
 Images by Taylor Mathis
Real-World Background: Portrait Mode
Dynamic, real-world backgrounds are very appealing when shooting products that have a specific use or are being modeled by a person -- as you saw in the picture of the briefcase earlier in this guide. But, it's easy for a real-world background to steal the focus of the photo, making it unclear which item in the photo you're actually selling.
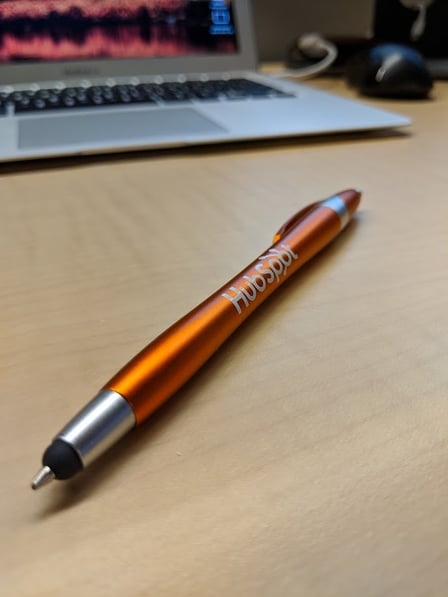
Give your product depth and emphasis with portrait mode, a picture setting on most professional cameras and also available on many new smartphones. This setting blurs the background so the context of the product is clear but not competing against the product itself.
Below is a super awesome photo of a HubSpot pen taken in portrait mode on a Google Pixel 2 (I took this picture myself). You can tell the pen sits on a desk with a computer behind it, but the pen is still the focal point for viewers:
"It's such an incredible photo, Braden. I totally want my own HubSpot pen now." Get one here!
6. Shoot a Variety of Images
My last ecommerce photography tip to you is to not stop at one photo per product. Just as your customers look, hold, use, and even try on merchandise in a store, your website should shoot a variety of images to simulate this very experience.
If you're shooting clothing, for instance, capture the garment of clothing alone -- that is, spread out on a white surface -- as well as on a mannequin whose color contrasts the color of the product. Then, for additional photos, have the clothing modeled on a person, allowing you to take pictures of the product from the person's different poses and angles.
Don't feel obligated to invest in every tip and piece of equipment at once. Apply these product photography tips gradually to see what makes your store look the most presentable, and change your approach as your photography chops get better.
from Marketing https://blog.hubspot.com/marketing/product-photography-tips
No comments:
Post a Comment