About 6 months ago I decided that I was going to build a SaaS company from scratch. I had recently sold my company and found myself in discussions with a number of startups around making angel investments. This didn’t get me too excited so I wanted to see if I could build and launch a SaaS company for the same amount of money that I would have otherwise angel invested into other companies.
My thought process was that if I could pull it off then I would own 100% of the company, and have full control of my own destiny, rather than simply cutting a check and owning less than 1% of the company.
My background is primarily concentrated on small businesses, selling products like leads and back office software. In the past 6 years I’ve had thousands of conversations with small businesses discussing everything from how they operate to where they are spending money on marketing. Through these conversations I realized that a lot of businesses are leaving money on the table by not knowing where their phone calls are being generated from, not answering the phone all the time, and not knowing how to close a prospect once they are on the phone with them.
It was through these conversations and the success of the Twilio IPO that I decided I was going to build call tracking software.
Now that we have launched and have paying customers, I’m sharing the tactics I used to build and launch a SaaS company, along with the documentation that I created during this process including email outreach scripts, user stories, product requirements doc, and other tools I used to make it happen.
Step 1: Finding a Designer
In my opinion, design and user experience (UX) is one of the most important aspects of SaaS. Good design will go a long way to not only convert customers but help them engage with your product and ultimately retain.
To find a designer I used Dribbble, a community of designers that showcase their work. There are other similar sites out there like Carbonmade or Behance but I’ve used Dribbble in the past and felt more comfortable there.
You must be a paid member of the community to send a message to designers, which costs $20 for the year. After coughing up the twenty bucks (obviously worth it), I took about 6 hours one day and searched for designs that I loved.
I would search for things like “b2b dashboard”, “saas dashboard”, etc:

After browsing through hundreds of designers and portfolios, I narrowed down a list of my top 10. Since not all of them would be available to take on a new project, I decided I needed to contact them all in hopes that at least a couple of them would be able to work with me, at which point I would then select my favorite.
I sent them all this message:
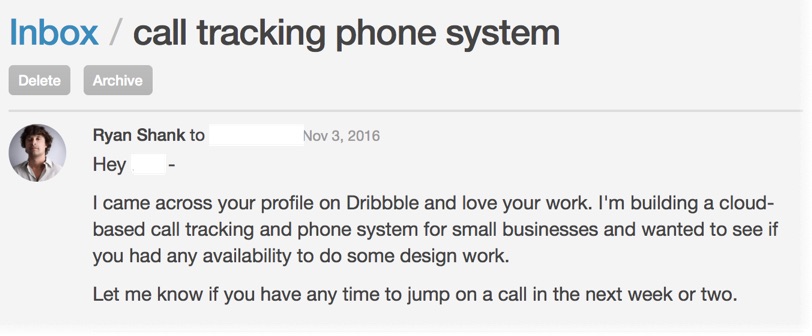
Of the 10 messages sent, I received 8 replies. One of the designers was not available for work (but replied anyway.. boom!) and 7 of them invited me to an exploratory call.
Here’s the funnel for my designer search:

The designer that I ended up choosing does amazing work, has relevant experience, and totally understood what I was doing. I personally wanted someone who I could lean on as a thought partner rather than them just blindly doing everything I told them. From the initial phone and Skype conversations, I could tell that the designer I chose was that person.
After thoroughly discussing requirements (more on that in a little), we landed on a fixed price for the project to be paid out at the completion of each deliverable.
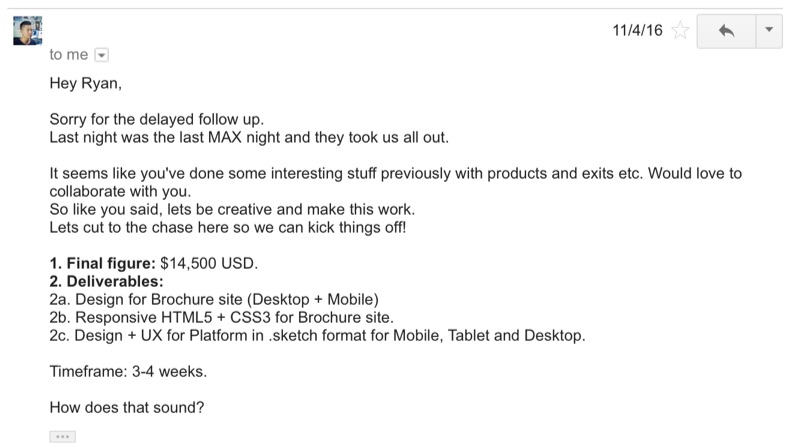
Here is a cleaner view of the design deliverables:
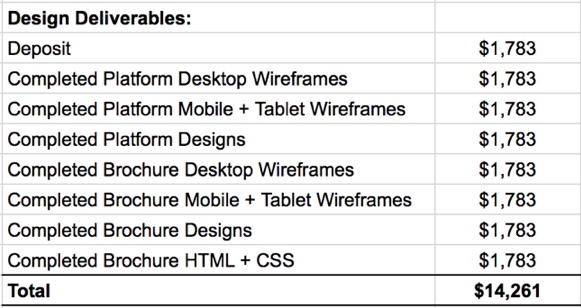
I didn’t intend on spending this much money on design – however, it’s my assumption that good design and a beautiful user experience will pay off exponentially in the long run through higher customer lifetime value due to increased retention.
Step 2: Create Product Requirements
I don’t like the phrase “product requirements”. It sounds very corporate and heavy. When I refer to product requirements, I’m referring to all the various documents that help tell the story about what the product is, how it works, and who will be using it.
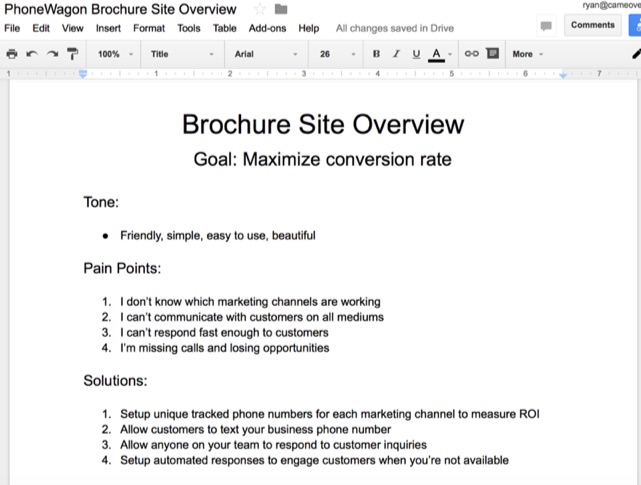
First, I created a very basic product design overview document (here) and product features document (here). These were created to provide both a high level overview of the product and very specific features that the product must have in order to provide value.
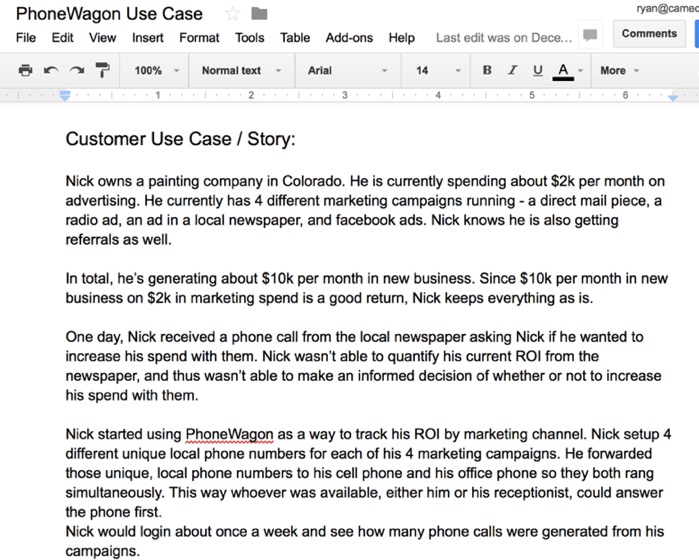
Next, I typed up a real life example of why the product is needed and the problem that it’s solving.
Finally, I created another document that went over the pain points that we are solving for and the solution that we’re offering to those pain points.
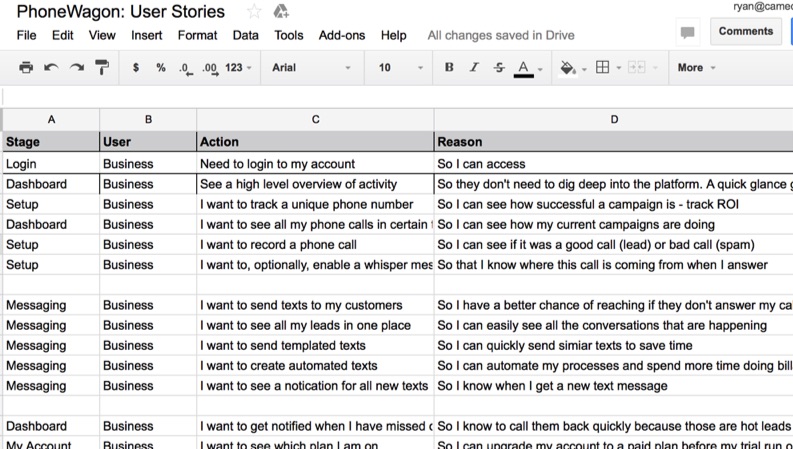
My designer recommended that we create user stories as well. As Mountain Goat Software explains, user stories are part of an agile approach that helps shift the focus from writing about requirements to talking about them. All agile user stories include a written sentence or two and, more importantly, a series of conversations about the desired functionality.
Ours ended up looking like this:
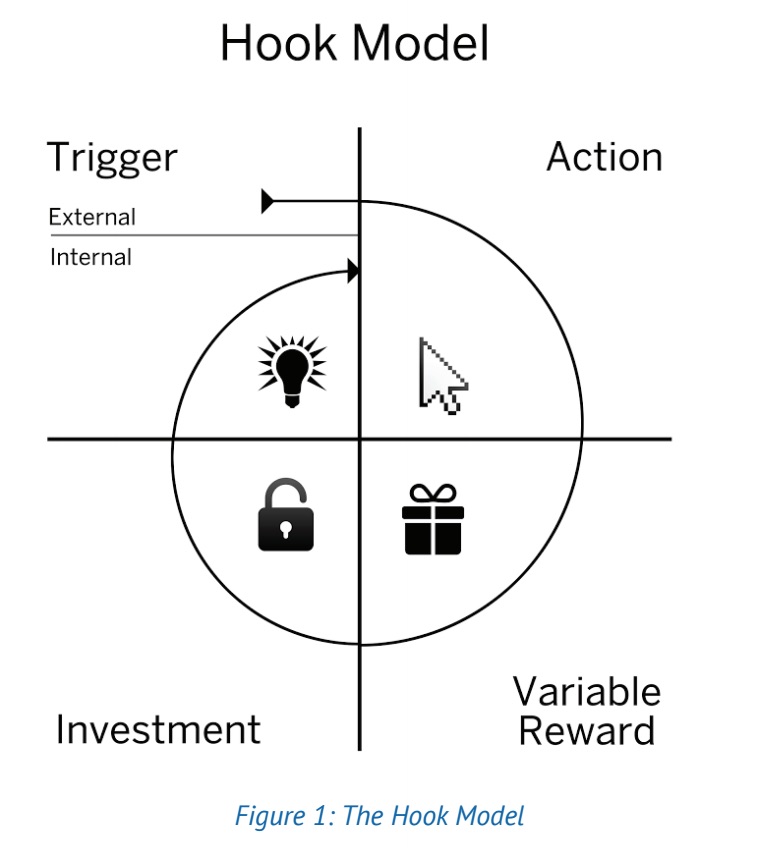
We also filled out a worksheet based on the Hook model, the four step process companies use to build consumer habits. If you aren’t familiar, Hooked is an amazing book about how to build habit-forming products.
Summary
During this phase we created the following documents to help us define our product requirements:
- Product Design Overview
- Product Features
- Real life use case story
- Pain Points & Solutions
- User Stories
- Hook Model worksheet
Now that we had thoroughly defined the product, it was time to move on to the agreed upon deliverables from the designer.
Step 3: Design Deliverables
My designer was very transparent and collaborative during the design phase. We would be in constant contact and talked on Skype throughout the day.
He would sometimes send me previews of wireframes and designs in Skype but would always throw them in a program like InVision afterwards to make sure everything is easily accessible.
The design process was very straightforward. We would spend a lot of time on wireframes because that’s where the customer experience and flow gets hashed out. This took quite a bit of time and a lot of back and forth thinking through various scenarios. After we nailed the wireframes, we moved on to design. My designer would send some designs along for feedback and I would comment on them until we landed on something we both agreed on.
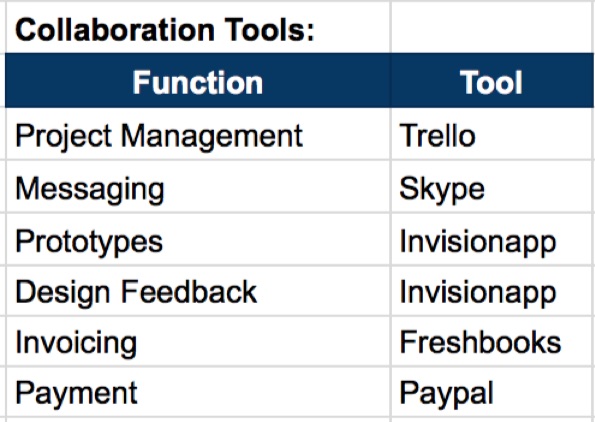
During the design phase we used a number of tools for various functions like providing a preview of the current designs (InVision) to submitting an invoice for the completion of each deliverable milestone (Freshbooks).
Here’s a quick list of the tools we used:
Step 4: Finding a Developer
The next step to building our SaaS product was, well, building it. Similar to how I searched for a designer on Dribbble, it was now time to search for a developer.
Before I began my search I needed to decide on a few things. First, I needed to decide if I was okay with using an offshore developer. Next, I needed to decide on the level of experience required. Finally, I needed to decide if I wanted a freelance developer or one that was working inside of a company.
While these aren’t exact, the ballpark hourly rates for different experience levels are below:
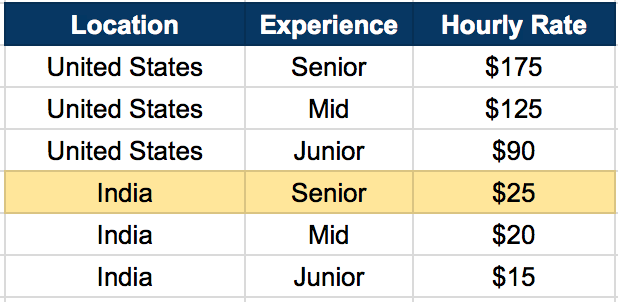
Due to cost I decided I wanted to hire a senior developer in India who was working inside of a company (not freelancing). That way I got access to project managers who would be holding them accountable.
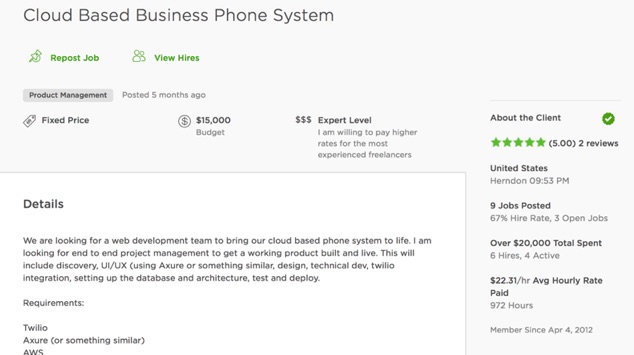
To find the developer I was looking for I used Upwork, a website that connects clients with freelancers. I created a job post and detailed out what I was looking for.
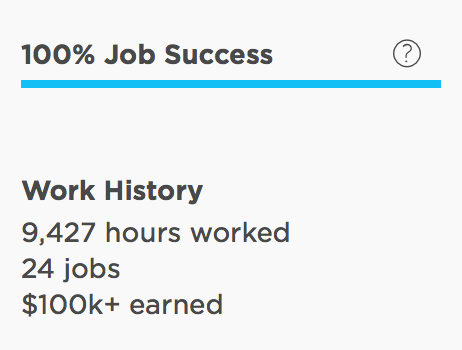
I received 39 applications to my job post and interviewed 6 people. To decide who I would interview, I looked very carefully at 3 things:
- Reviews
- Job Success Score
- Number of Verified Hours
The developer I ended up going with had over 9,000 hours completed through Upwork and 100% job success score, meaning that 100% of his jobs resulted in a great client experience. These are numbers that the freelancers cannot manipulate so they are taken very seriously. In addition to our conversations, these things made me I feel comfortable hiring him.
Step 5: Building The Product
Building a software product from the ground up is challenging. There are a number of things to do that include setting up the project architecture, creating the database with schemas, tables, and triggers, setting up webhooks for API calls, creating login credential validation, and so much more.
My developer gave me a rough estimate on the number of hours it would take to complete these various stages and updates me every 4 weeks on the status of our milestones.
![]()
He also sends me daily email updates so I know exactly what he’s working on each day.
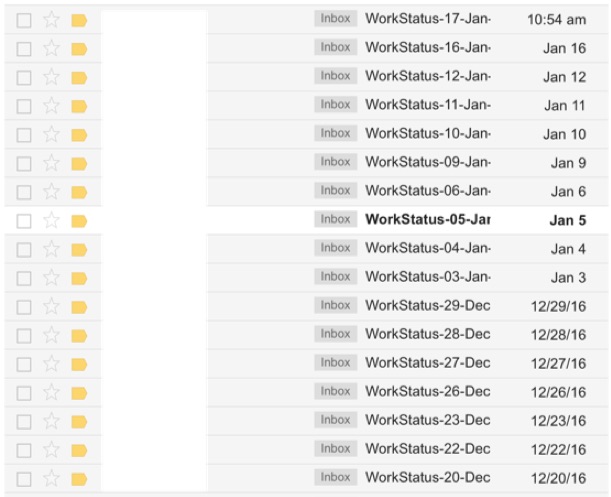
We are also in constant communication at nearly all hours of the day. My developer is also a thought partner – he is coming up with scenarios that I’m not thinking of and providing very valuable product recommendations. This is incredibly valuable.
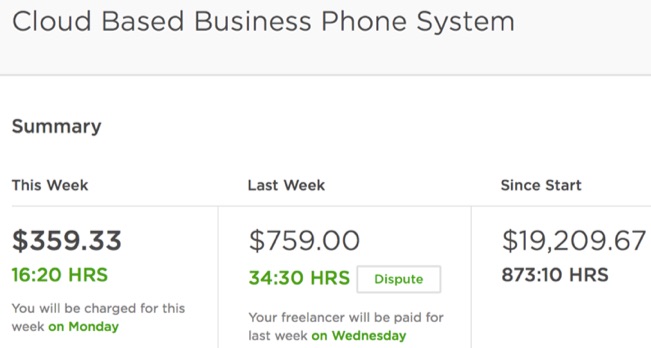
After about 6 months and over 850 hours, we were finally able to get a product shipped.
Here’s a snapshot of the developer’s hours as of the time of this posting:
Step 6: Marketing & Sales
Now that I had a working product, it was time to begin selling it. Now of course there’s a ton of content out there that goes over SaaS marketing and sales. I’m not going to dive into it too deep but rather give you an overview of what I did to begin selling my product.
To start, I registered a domain using GoDaddy, used WPEngine to host my site, setup branded emails with Google Apps, and then threw up a WordPress landing page.
To get my WordPress landing page designed and implemented, I posted a job on Upwork.
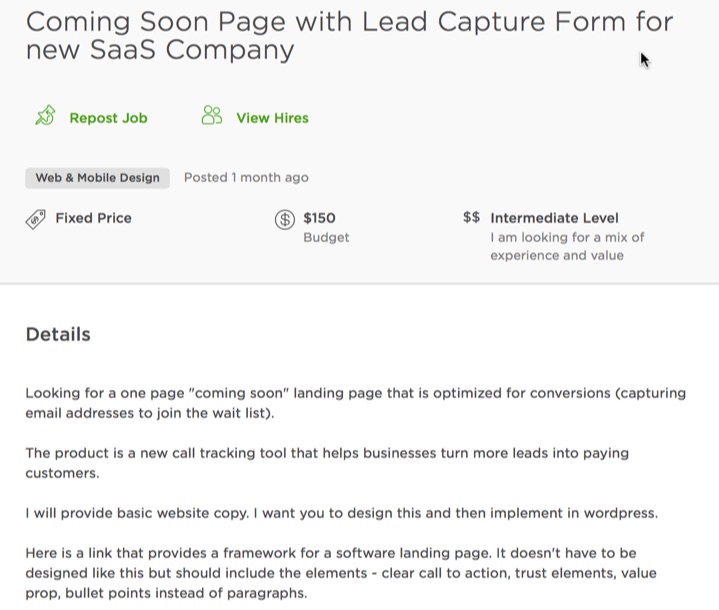
I paid $150 for this to be done and it took them about 2 days. The guy I used for this used the WordPress theme Divi, which is a powerful theme that makes it easy to build wordpress sites with their visual builder (so you don’t need to know how to code).
After the landing page was up, I ran some basic Facebook ads to drive traffic to the site. From there I would call every single person that submitted their information through my form.
I created various phone scripts to document what was working and what wasn’t. I was able to get a couple paying customers using this method. I would create their account on the backend and charge them manually in Stripe. Then I would send them the URL of our software application along with their username and password.
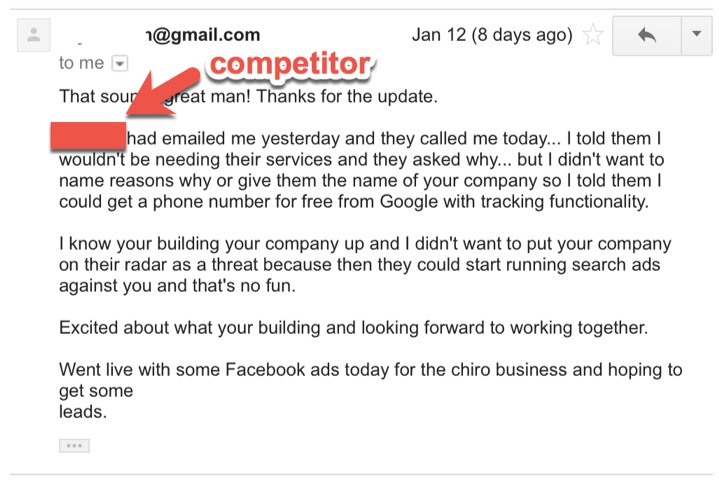
My first customers loved that they were early adopters and able to contribute valuable feedback that would shape the product in the future.
Here’s a cool email I got from one of my first few customers:
Conclusion
All in all, I spent just under $40k building my SaaS product:
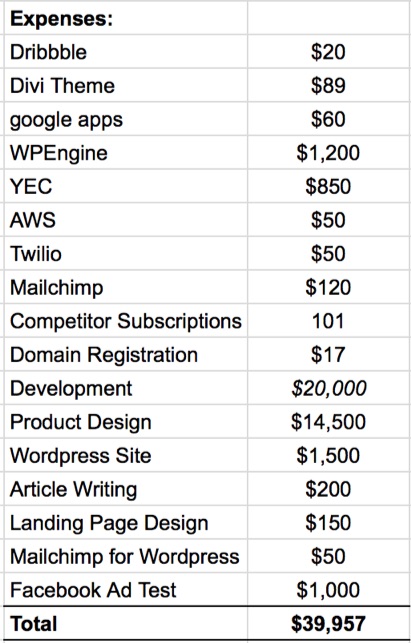
I’m confident that if you use this approach you can also build a SaaS product for under $40k. This is a great alternative to raising a ton of money and diluting yourself and your future employees.
It isn’t going to be easy. It will require a lot of focus and effort. But if are able to follow this outline and find a talented developer and designer, you will be able to get your SaaS company off the ground. You don’t need a ton of cash or to raise venture capital to do this.
I hope this post inspires you to build and launch a SaaS company that people love.
About the Author: Ryan Shank is the founder of PhoneWagon, beautiful call tracking software that helps businesses improve their marketing spend by using unique local phone numbers on each of their campaigns. Previously, Ryan was the COO at mHelpDesk which was acquired by HomeAdvisor in 2014. Connect with him on LinkedIn or Twitter.
from The Kissmetrics Marketing Blog https://blog.kissmetrics.com/built-and-launched-a-saas-company/
No comments:
Post a Comment